Welcome to 5th edition of 12 Months of Sensory Dough where 12 KBN Bloggers will bring you their special spin on a popular sensory dough. This month’s feature… Moon Sand! Our hope is to provide a resource where you can find all things Sensory Dough in one place. We feel so excited about this being a place for you to find and share great ideas, that we have opened our link-ups for an entire year.
{THIS POST MAY CONTAIN AFFILIATE LINKS TO MATERIALS I RECOMMEND. ANYTHING YOU PURCHASE THROUGH THESE LINKS HELPS SUPPORT LEMON LIME ADVENTURES. THANK YOU IN ADVANCE FOR CHOOSING TO SUPPORT US.}
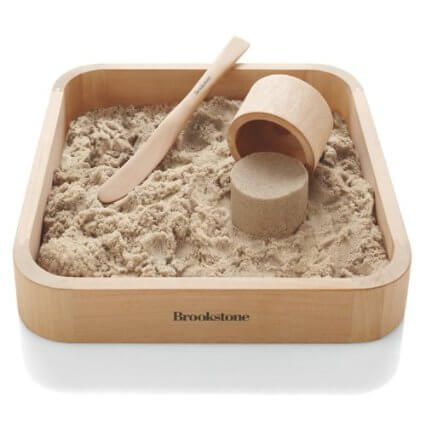
WHAT IS MOON SAND?
Simply put, Moon Sand is… 4 Ingredients.
Flour
Cornstarch
Oil
Sand
As you will read from my co-hosts, there are variations and differing opinions as to what Moon Sand is and how it should react.
Should it be made with water? Should it be oil?
Should it repel water? Should it absorb water?
Let’s Find Out!
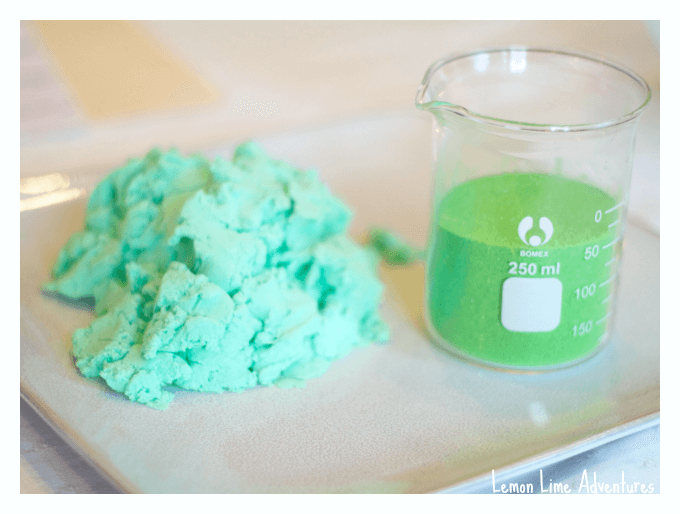
WHAT SHOULD MOON SAND LOOK LIKE?

According to my good friends at The Imagination Tree , Crayon Box Chronicles and Mommas Fun World, you might describe Moon Sand as:
Moldable
Squooshable
and Never Drying
If you click through to their recipes you will see that they both differ slightly and even they don’t all agree on the liquid ingredients. So we set out to figure out the best Moon Sand Recipe!
WHAT EXPERIMENT DID WE DO WITH MOON SAND?
When we started our explorations with Moon Sand, we had every intention to compare store bought Moon Sand to our very own Homemade recipe. However, we love science so much that we wanted to test the properties of the main ingredient (Sand) before making our own.
We researched moon sand science and were amazed to learn that there are so many cool and fun experiments that can be done with Moon Sand.
We started by comparing the properties of Play Sand vs. Store Bought Moon Sand.
Each boy was given the same amount of each material and they were left to feel, smell, manipulate and describe the properties.
Both boys wrote down their observations as they squeezed, poured, and attempted to mold each material.
They immediately noticed the differences. While we wrote our observations on recycled paper, I have made a Comparing Properties Printable for you to use.
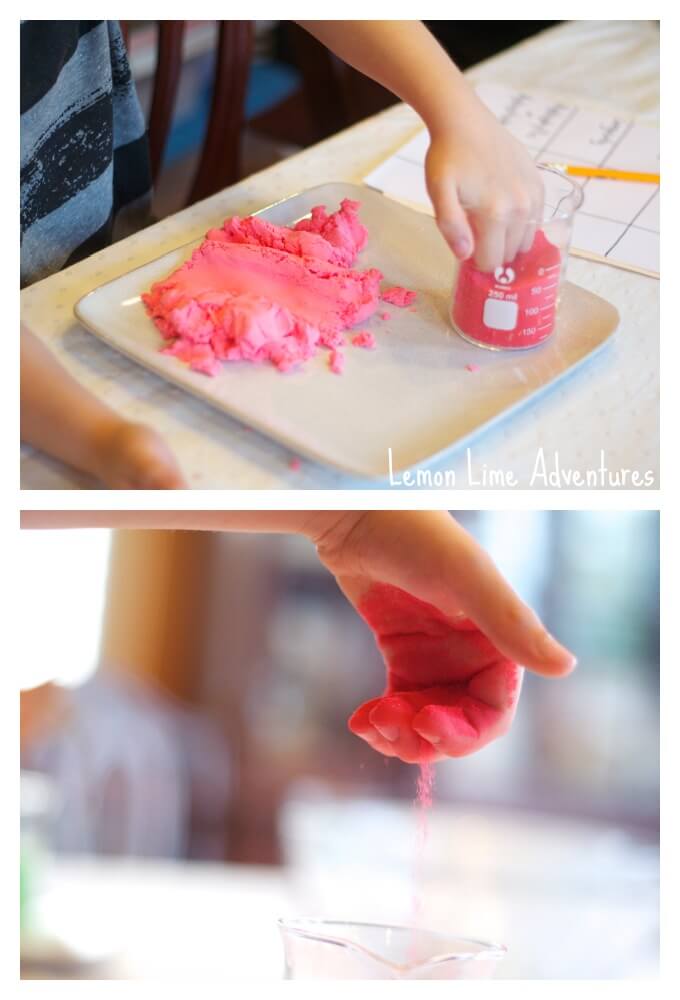
After learning about what it means for a material to be hydrophyllic or hydrophobic, it was time to test our sands.
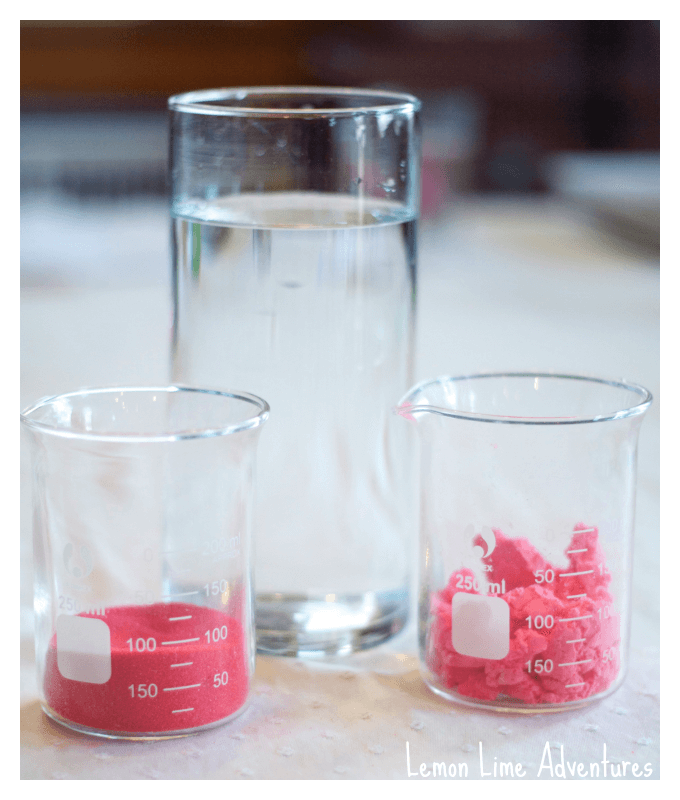
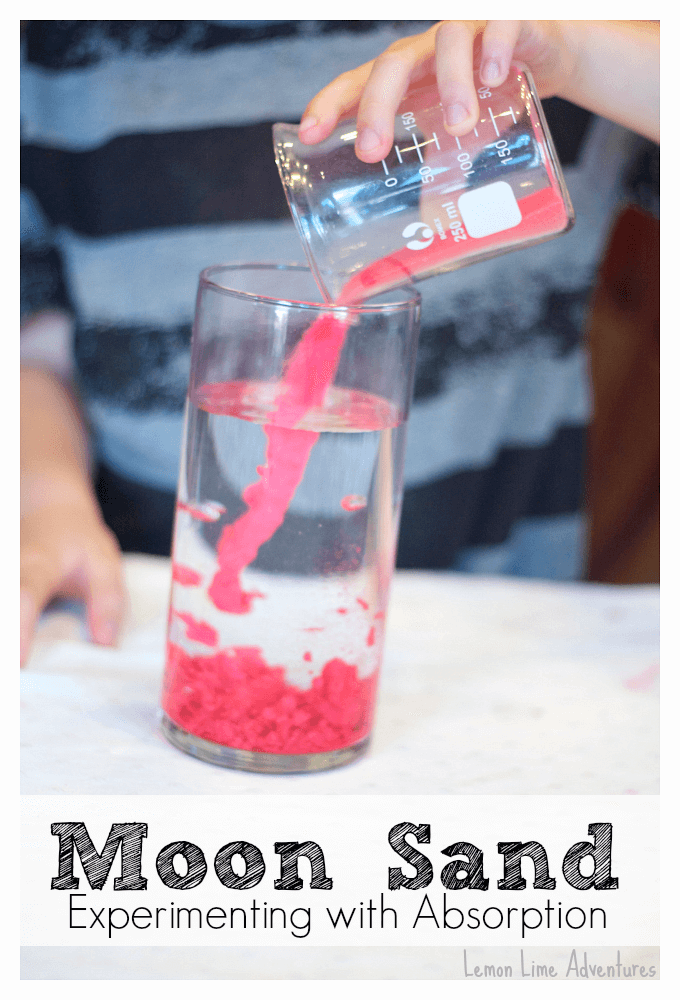
Now came the really fun part! To test the absorption of each material we got out our favorite glass beakers, measured out our moon sand and play sand and filled a vase with water.
Before we began, the boys made predictions for each material and recorded their thoughts. I have made a Simple Prediction and Observation Printable for you to use, if you want.
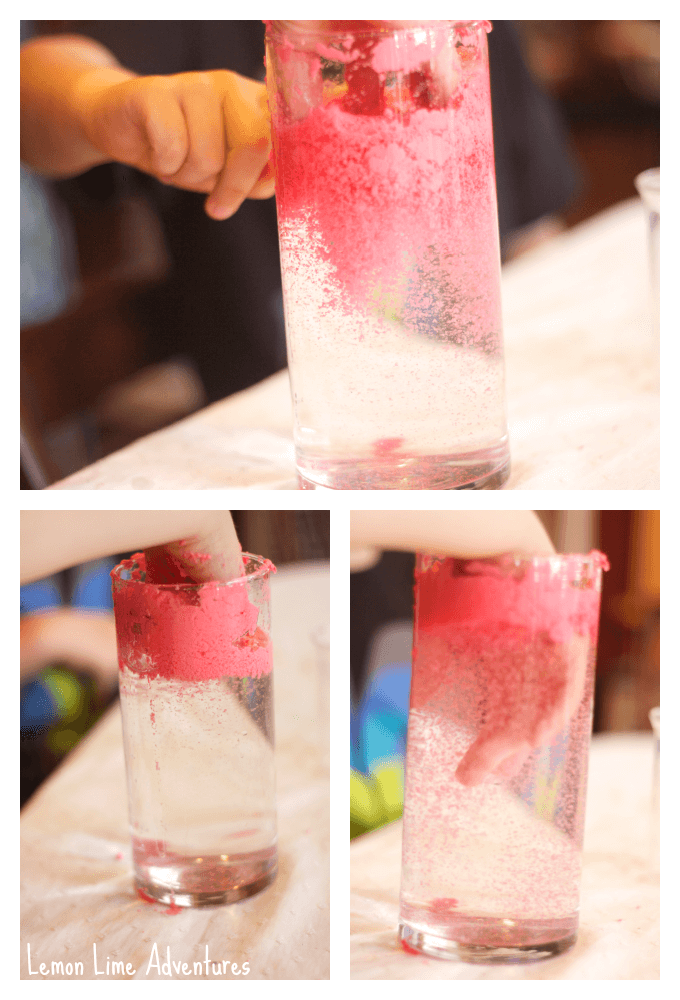
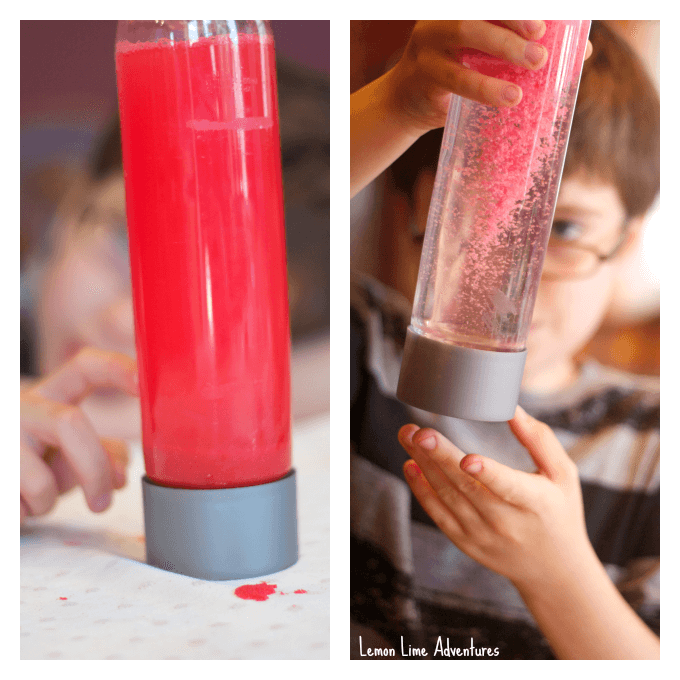
We started by adding the Moon Sand into the water. Immediately the boys noticed that it didn’t mix with the water. They were determined to get it to mix and sink.
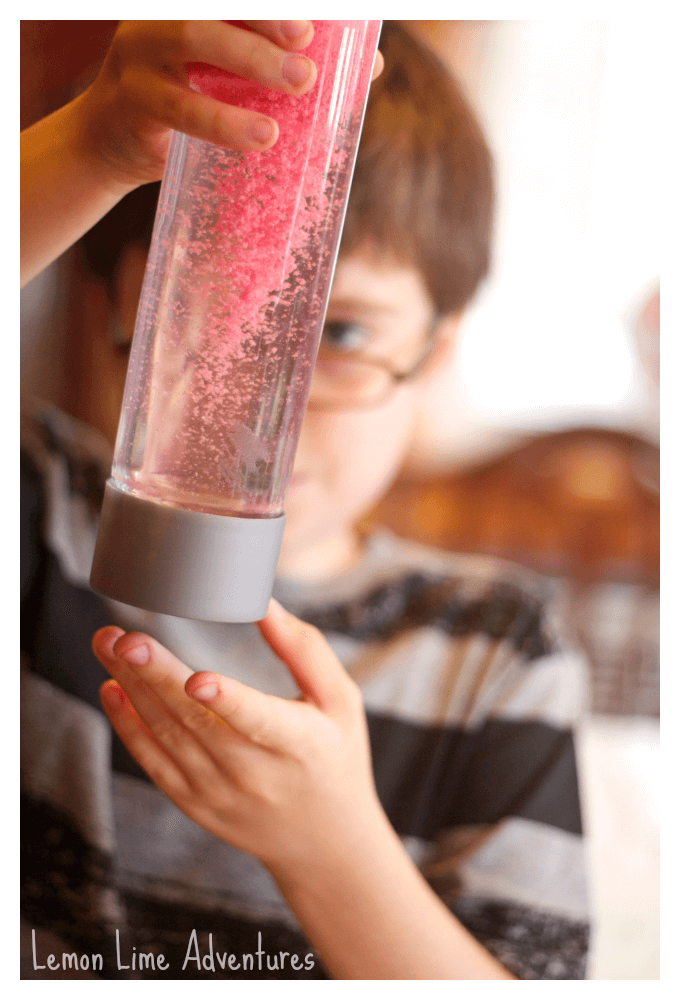
So we put it in one of our favorite bottles we use for sensory bottles, and WOAH!
AMAZEMENT!
( We will leave the sensory bottles for another post and attempt to stay on track, but you can see why we got so distracted)

Next, it was time for the play sand. We poured it in and watched for the reaction. The boys sat in awe as it repelled the water and formed the COOLEST formation in the bottom of the vase.
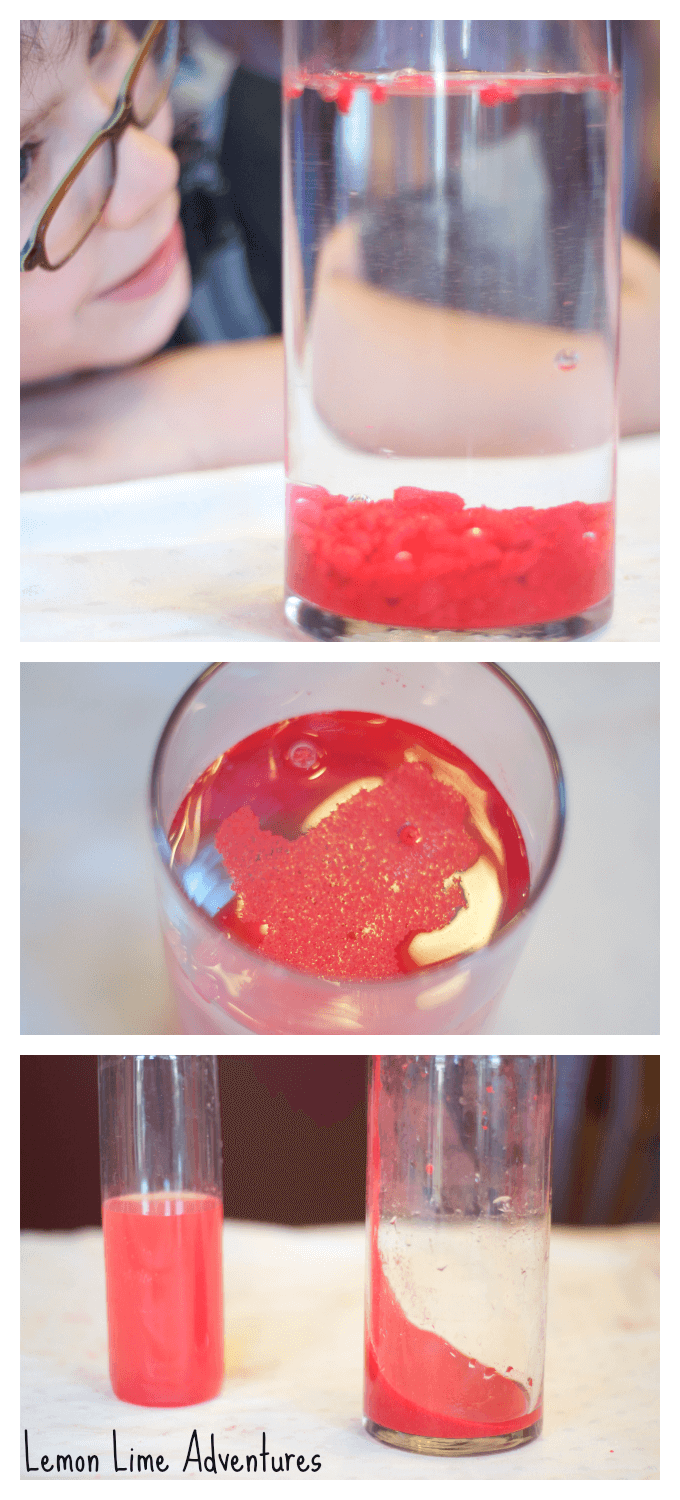
I think they watch the bubbles rise and fall for at least 20 minutes before finally transferring the sand to a bottle to compare it to the moon sand sensory bottle.
WERE WE SUCCESSFUL AT MAKING MOON SAND?
Ha. As you can see, we didn’t even get to making the Moon Sand. We spent well over an hour doing this experiment alone.
Not to mention the time we spent exploring and comparing the density of moon sand vs. play sand.
Next on our lesson plans, Make Homemade Moon Sand! You better believe we will be comparing it in a sensory jar as well!
Until then, You have to check out all of my friends that are trying out Moon Sand, too!
NOW FOR THE FUN PART…
Would you call this recipe a success or a fail? Do you have a favorite Moon Sand recipe or activity that you consider a success or do you have a fail you want to share? We want to see! Link up your posts or post pictures to Facebook, Instagram, Twitter orGoogle+. Tag your pictures with#ilovesensorydough.
Be sure to check out each blogger, as we will each provide a different take on the dough, some of us with have the BEST recipe ever, while others (probably me) will show you our attempts (both failed and successful)
You can read more about each Co-hosts and more about the Series or follow along below:
LEMON LIME ADVENTURE~LOOK! WE’RE LEARNING!~GLITTERING MUFFINS~STILL PLAYING SCHOOL~
LITTLE BINS FOR LITTLE HANDS!~NATURAL BEACH LIVING~THE EYES OF A BOY~POWERFUL MOTHERING~
WILDFLOWER RAMBLINGS!~I HEART CRAFTY THINGS~DELIGHTFUL LEARNING ~THE LIFE OF JENNIFER DAWN
PLEASE READ THE FOLLOWING GUIDELINES BEFORE LINKING UP.
- Share family-friendly posts related to the month’s theme. Feel free to link old or new posts that highlight your favorite recipes for sensory dough. Failures and unsuccessful attempts are welcome.
- We ask that no posts are linked with copy/paste recipes from other sources. If you use a recipe from another source, please link back to the original recipe.
- By linking up, you give permission to share your post and one photograph in future posts and through social media channels.
- Visit 2-3 other posts that others have shared. Discover new ideas and meet new friends!
- If you would like to, please grab the 12 Months of Sensory Dough button for your blog.
The linky will remain open all year. On the 12th of each month, all co-hosts will post a new dough with their spin, highlighting at least one post from the month before and pin each post to the 12 Months of Sensory Dough Board.
Follow Dayna :: Lemon Lime Adventures’s board Best of the Best Sensory Dough on Pinterest.
GET READY FOR NEXT MONTH: ICE CREAM DOUGH


Finally we know what was in that bottle you posted on FB! 🙂 So fun! Reminds me a bit of our “magic sand.”
I know right 🙂
So COOL! I really want to make hydrophobic moon sand now!! Your pics are great! You pulled off a great experiment and post to boot on top of your crash. You rock!
Thank you! You are too sweet. It was so much fun!
What a fantastic experiment! Your pictures are amazing!
Thanks so much for this informative post! I love the different experiments you chose to do with the moon sand. 🙂 Can’t wait to try some out with my kiddo soon.
Pingback: eduardo vela ruiz
Pingback: Make Your Own Moon Sand! |
Pingback: Fraboom Buzz » Create your own Moon Sand!
Pingback: Sensory Bottles | Experimenting with Absorption - Lemon Lime Adventures
Pingback: Moon Sand Experiment! | Educents Blog