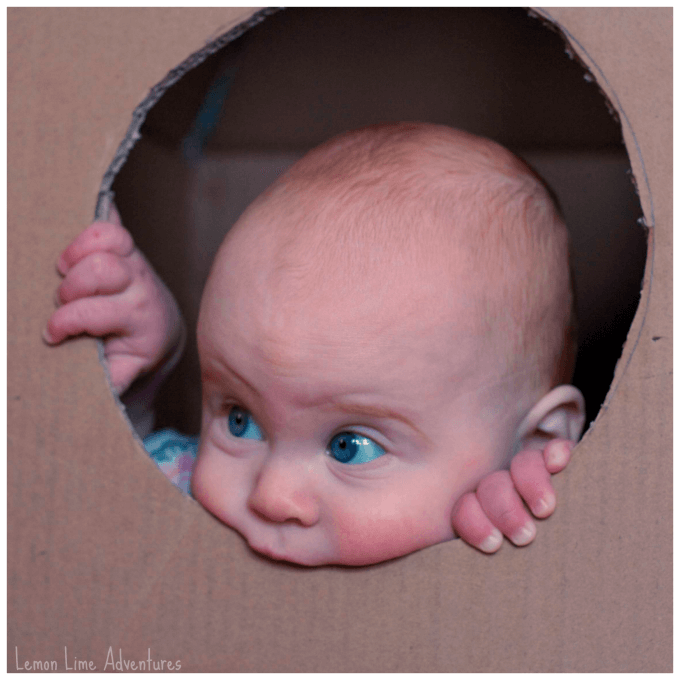
If you are regular here, you know meltdowns and sensory overload tend to be very regular things in our house. A few months ago we were at our wits end, and decided we really needed a safe, quiet space that would encourage our son to use it when we has getting overstimulated or frustrated. Since we regularly make recycled crafts and my oldest son loves anything space related, it was a no brainer to create a cardboard rocket ship! I was pretty sure it was going to be the perfect calm down sensory retreat for Legoman, but also be a great place for creativity, pretend play, and reading fun! I had no clue just how popular it would be.
{THIS POST MAY CONTAIN AFFILIATE LINKS TO MATERIALS I RECOMMEND. ANYTHING YOU PURCHASE THROUGH THESE LINKS HELPS SUPPORT LEMON LIME ADVENTURES. THANK YOU IN ADVANCE FOR CHOOSING TO SUPPORT US.}
After presenting my idea to the boys (age 6 and 8), I googled as many cardboard rocket instructions as I could find, and finally decided to make our own variation. I love to involve the boys in the planning and engineering of any of our projects, so naturally I had Legoman draw out his plans for our future cardboard rocket ship.
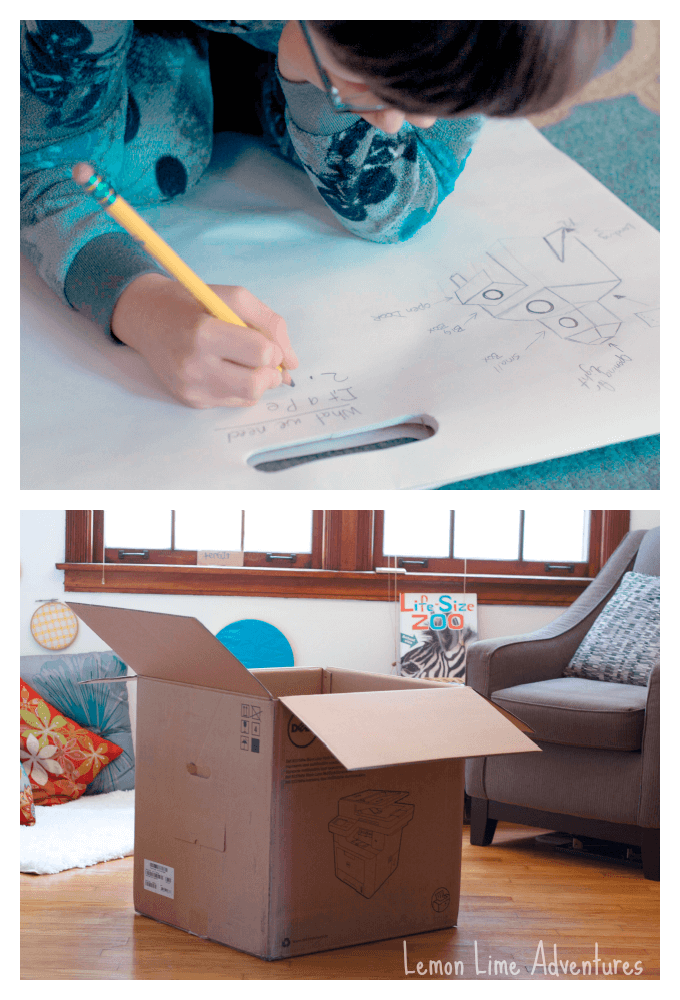
Luckily we had just gotten our new printer in and had the perfect box. You can use any large box, I know some people love refrigerator boxes or washing machine boxes. I was a tad worried our box would be a little too small, but it turned out that it’s size was absolutely perfect for giving a tight squeeze!
Materials Needed To Make a Cardboard Rocket Ship
Cardboard Boxes (We used one Large and One small box)
Exacto Knife for cutting details and holes out
Duct Tape (We used decorative tape, because, well…. Its pretty)
Aluminum Foil (optional)
Additional Materials to Turn your Rocket into a Squish Box
Pillows
Blankets
Stuffed Animals
Favorite Books
To learn more about squish boxes, be sure to check out A Sensory Life where she gives more great examples and explains all the benefits! If you just want to use your rocket for creativity and a special book nook, I know it would work well for those reasons too!
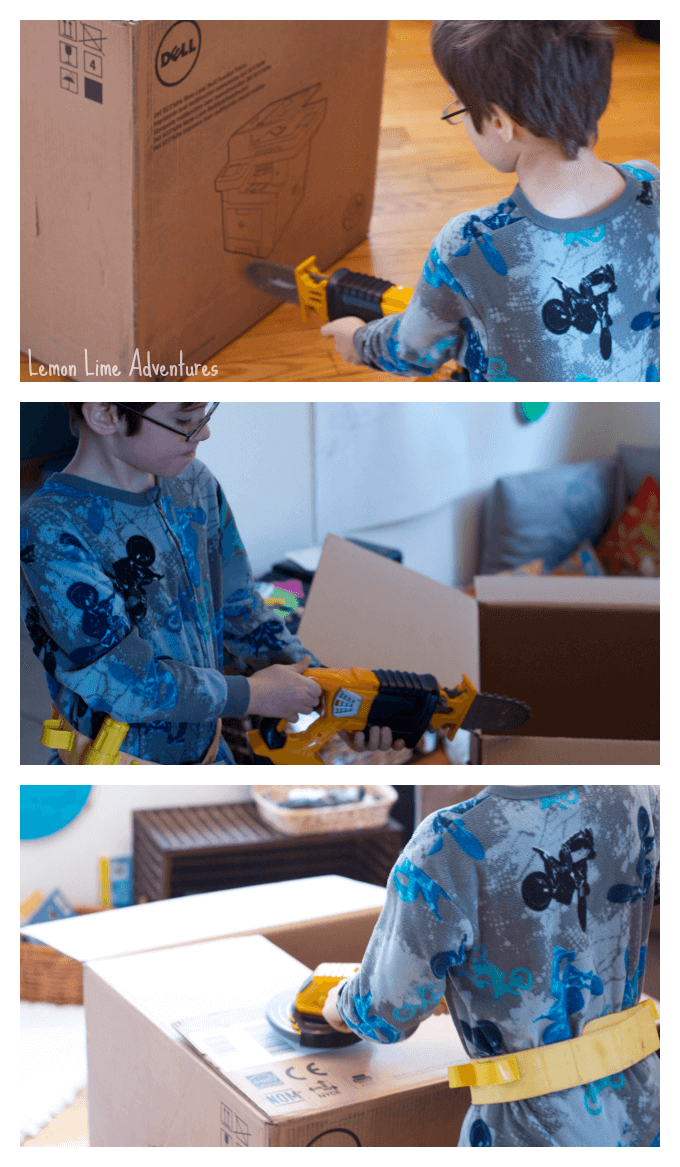
Like I already mentioned, we turned our cardboard rocket ship project into a family affair. Legoman got completely geared up in his construction gear, Bones was ready to help, and Super B couldn’t wait for her brothers to finish. Although it didn’t actually help get the project finished any faster, it made Legoman feel completely in control of this new space he was building and felt a great amount of pride as he sawed, sanded, and hammered his box.
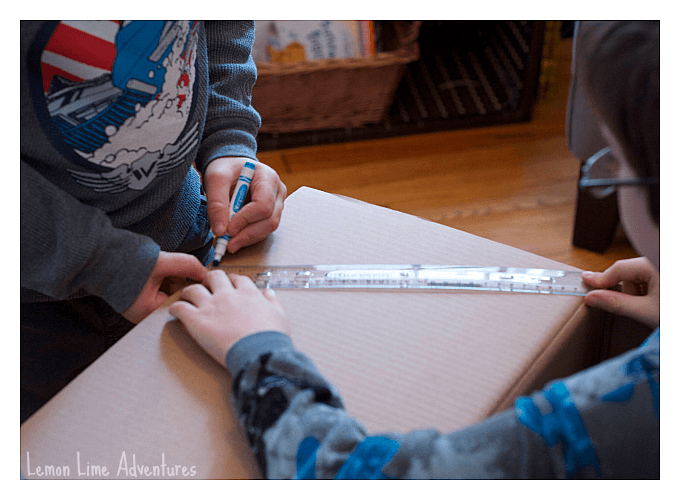
Now it was time to get to work on turning our boxes into a REAL ROCKET SHIP! The first step was to measure and mark all of the corners on our box flaps. We measured an equal distance from the outside edge to make sure that all of the flaps would fold up nicely. This will vary depending on the size of your box.
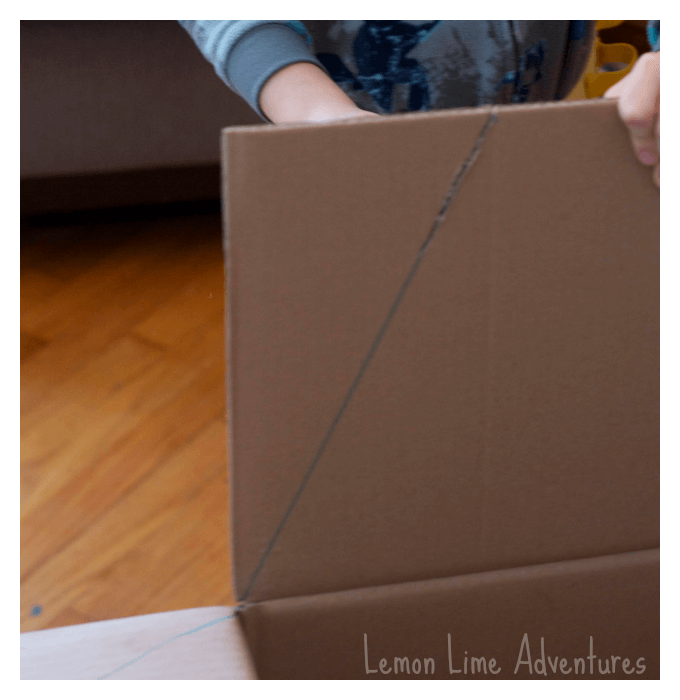 Both boys worked diligently together to mark the lines and then cut off the triangle corners. We got some kid-friendly saws and construction tools a few years back and have been waiting for just the right project to use them on. I scored the lines with an exacto knife and then let the boys do the rest. If you have younger children, you will want to make a judgement on what your children are able to manage and what tools you feel comfortable letting them use.
Once all the corners were cut off, we folded up the flaps and taped the corners together with Duct tape.
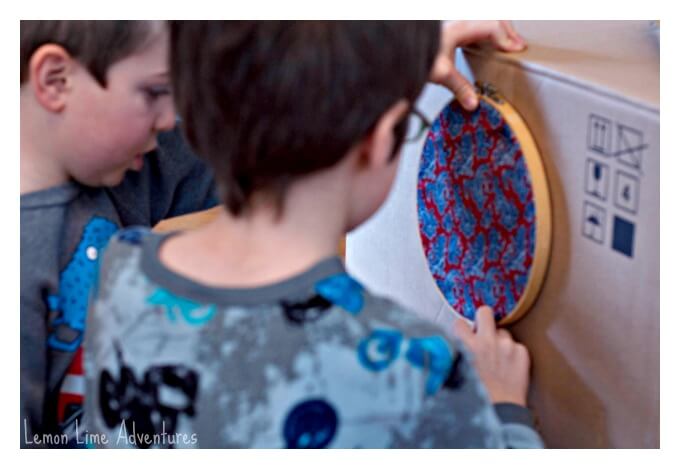 Next it was time to cut our circles. We actually used our fabric circles from our busy boxes to trace our circles. They were perfect because we were able to find a small, medium and large circle. If you do not have something like this, you can use different plates, bowls, or tupperware containers. This time, the boys traced and I cut out the holes.
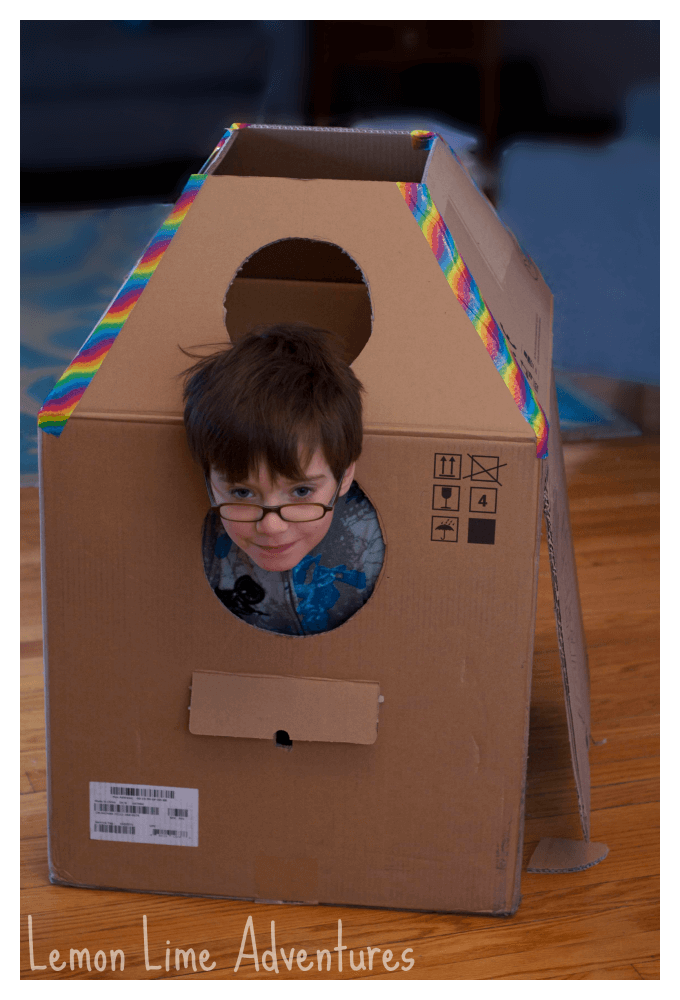
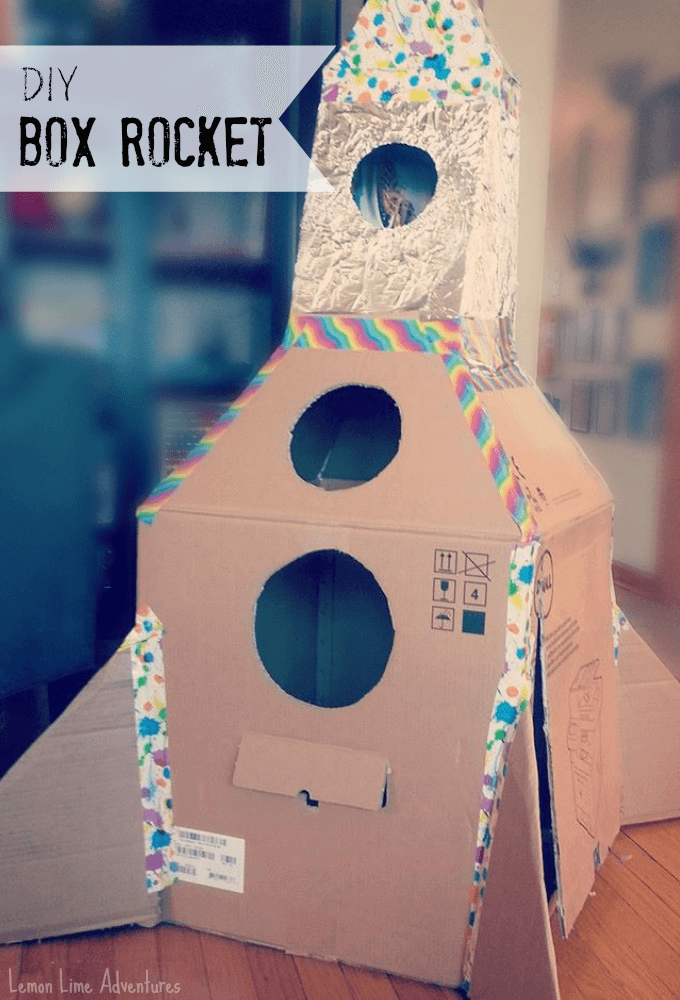
It was really starting to look like the bottom of a rocket. Our box had handle holes already in it, which made for a great mailslot (you know because all astronauts need mail). Then on one side I cut out a door, to make it easy to get in and out of the box.
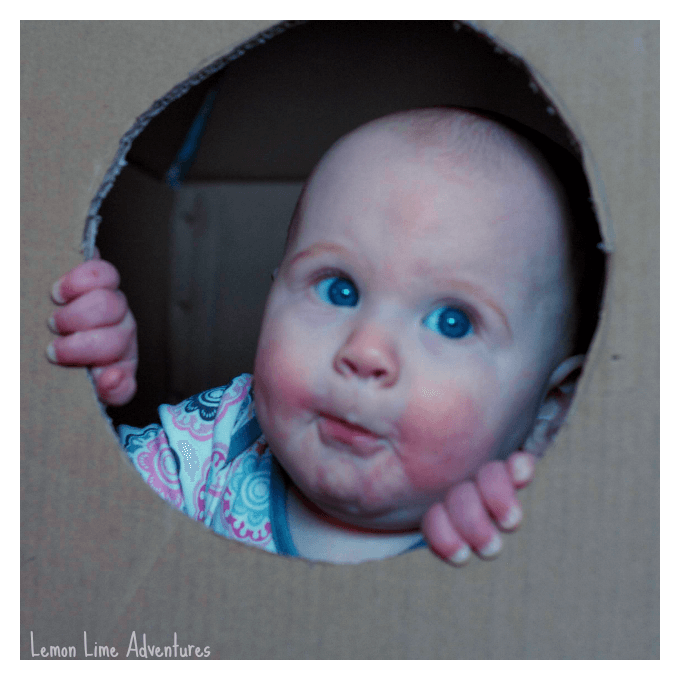
Everyone had to try it out! Even Super B! I would guess that the boys played with Super B in the base of the box for at least an hour. She would crawl in, they would give her “mail” through the slot and then she would hand it back and crawl out. This happened over and over!
Even though we were having a blast, we needed to finish this rocket! We repeated the same steps of measuring, cutting and taping the corners of a smaller box. We fit a few boxes on top to find the one that fit the best on our opening, without much extra room.
(You will need to open the box on the bottom and cut off the bottom flaps, so that it will fit over the top of your big box. )

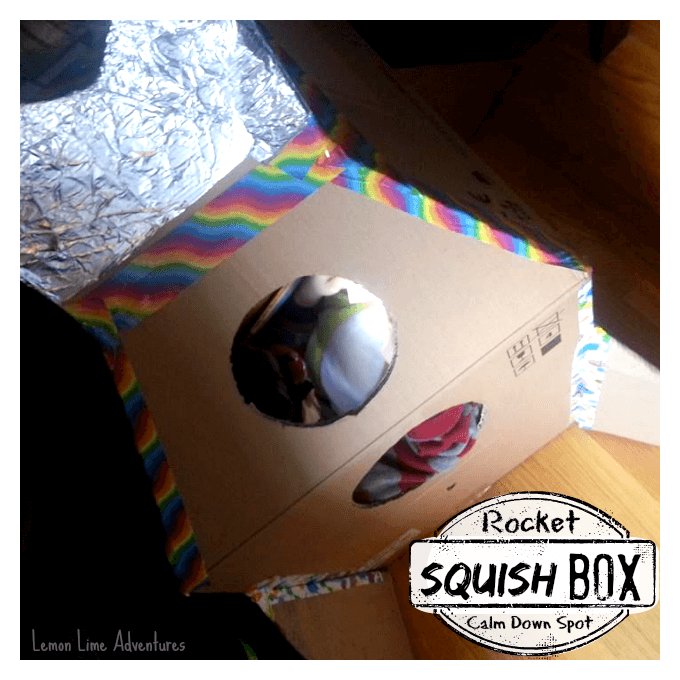
The top of the rocket ship was the trickiest part. We found that we had to cut out scraps to fit the top closure perfectly. This takes a little finess and I am sure you can make yours look better than ours. The boys decided that they didn’t want to paint the cardboard rocket ship, but that it would look pretty cool with aluminum foil on the top. So we used glue and some foil and wrapped away!
Like I said before, this rocket is great as a reading nook, a pretend play space, or a private getaway. We played with the box in the living room for a full week before we transported the rocket to the boys room.
Creating a Squish Box
Turning this or any cardboard play space into a squish box is easy to do. We took all of our extra pillows and stuffed them into the bottom of the box. We added a super soft comforter in the bottom and threw in a few favorite stuffed animals. The idea is for the space to be tight and allow children to push and squeeze without hurting anyone or anything around them.
We find the most benefits when we use this when Legoman is not SUPER Explosive already. However, there have been several meltdowns where we have suggested his rocket, and it has allowed him the input and quiet space he needed to calm down. Inside that rocket he is allowed to push and scream and tear papers if he needs to, however he has only done the extreme on 2 occasions. Usually it is his favorite place to just hang out, read his favorite comics, and get some alone time.
The key for us, is to make sure the rocket is not seen as a punishment, or a negative place. It is used during times of excitement, times of frustrations, and times of completely happiness.
Want more Calm Down Spaces and Calming Activities?
15+ Sure-Fire Tips for Calming an Angry Child
Free Chores Chart | Heavy Work to Calm and Focus
Follow my Calming Anxious or Explosive Kids Pinterest Board:
Follow Lemon Lime Adventures’s board Calming Anxious or Explosive Kids on Pinterest.
Do you have a special calm down retreat in your house? What does it look like? Or do you just love making special play spaces? Either way, I want to hear all about it and see pictures!
Connect with me on Facebook, Twitter, Google+, Pinterest, Instagram or subscribe by email. I can’t wait to hear your ideas.