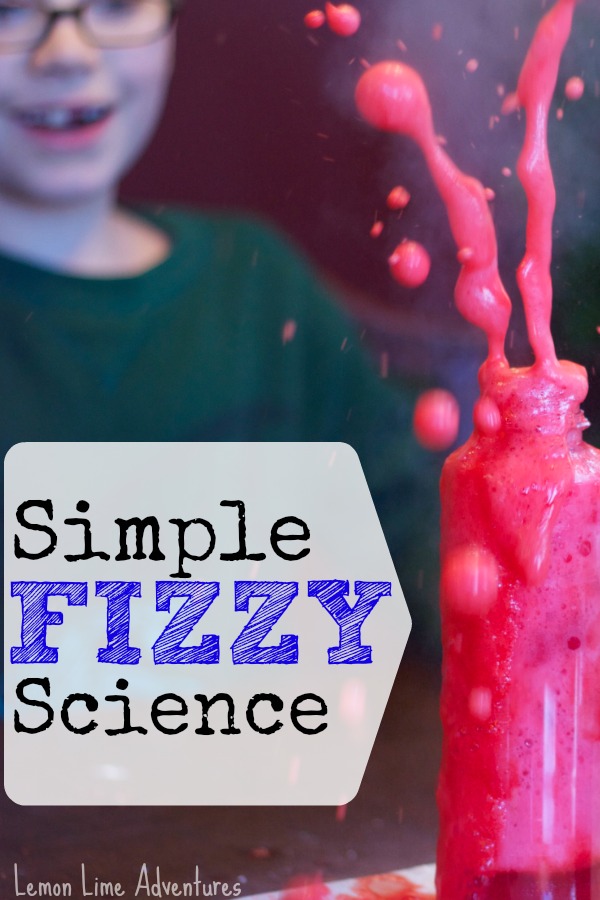
As always, I am excited to be back for another Saturday Science. Science is such a staple in our house and guides the rest of our lessons for the week. If you are a regular here, you know we have been studying rocks for the past month. We have explored the rock cycle, observed rocks, and even done a Lego rock excavation. This week I am so excited to share our simple science experiments we did to explore the pressure and build up in volcanoes.
{This post may contain affiliate links to materials I recommend. Anything you purchase through these links helps support Lemon Lime Adventures. Thank you in advance for choosing to support us.}
5 Simple Science Experiments
As a gift, the boys were given a Volcano kit that used the classic Vinegar and Baking Soda mixture. After watching videos about Volcanoes and Magma, and the build up… the boys couldn’t wait to try it out.
Sadly, the kit disappointed them. It was hard to fit the ingredients in the hole of the little plastic volcano, it didn’t “erupt” the way they wanted and it just didn’t give them the results they were hoping for. That is when we decided to take matters into our own hands and determine the BEST VARIABLES for a fizzy experiment.
Start with Simple Definitions:
A variable is the part of the experiment that is being tested.
The constants are the conditions in an experiment that remain the same and are unchangeable.
It is important to test only ONE VARIABLE at a time to help determine the effects you are causing.
To keep it simple, the Set-Up and Ingredients remained the same for all 5 Experiments.
Simple Science Ingredients:
Baking SodaVinegarFood Coloring (liquid or powdered)
Simple Science Experiment #1
After using our Volcano Kit, the boys (ages 6 and 8) were curious if it would make a difference if you changed the order (variable) of the ingredients.
We used the same containers, the same ingredients, and the same amounts (constants).
We used 100 ml of both Vinegar and Baking Soda in our favorite beakers. ( The amount doesn’t really matter. What was more important is that we used equal parts).
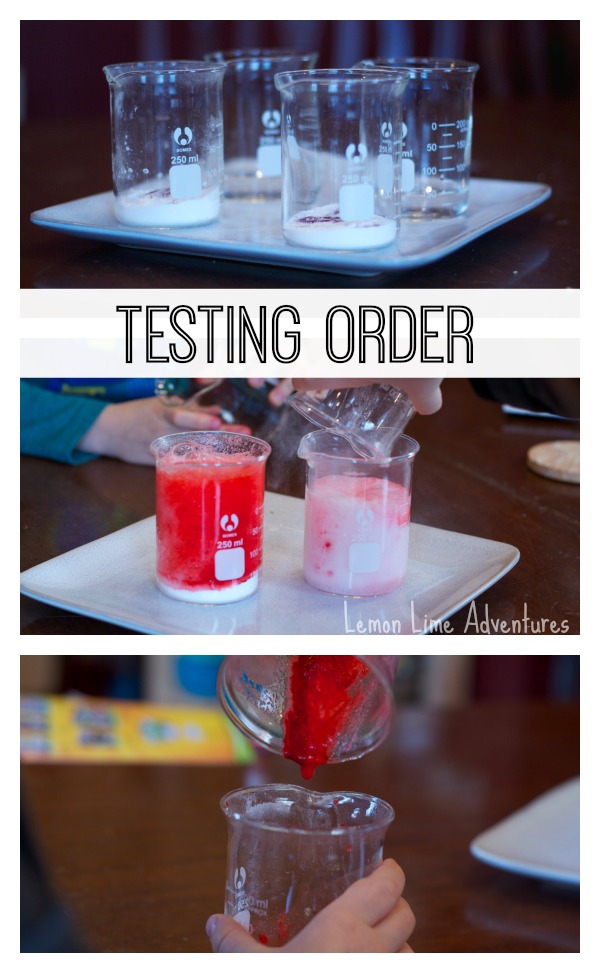
The conclusion was that the reaction was greater if you start with vinegar and then add in the baking soda. The boys both noticed that in both scenarios there was a sediment in the bottom, which led them to wonder if the experiment could be tweaked just a tad.
Simple Science Experiment #2
For the second experiment the boys were curious if it would make a difference if you changed the shape of the containers (variables).
We kept the amounts, the ingredients and the order the same (constants).
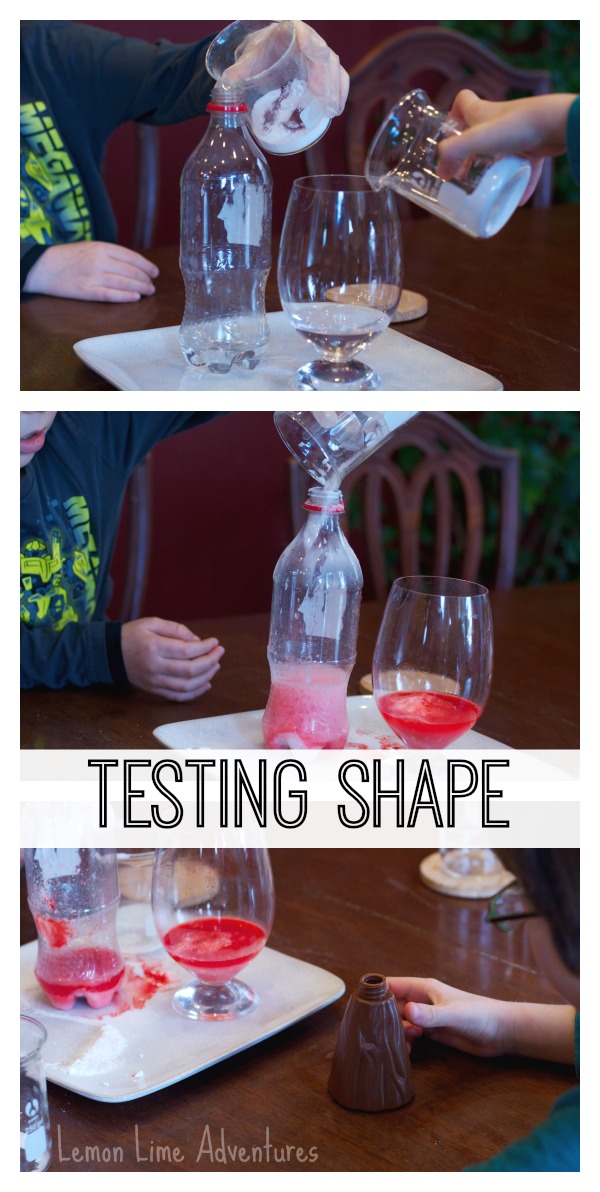
The conclusion was that while the shape was better if the container got smaller at the top, it might need a flat bottom because the boys both noticed that the sediment settled at the bottom of both containers. It made them wonder if the experiment could be tweaked even more.
Simple Science Experiment #3
For the third experiment the boys were curious if it would make a difference if you changed the size of the containers (variables).
We kept the amounts, the ingredients, the shape of the container and the order the same (constants).
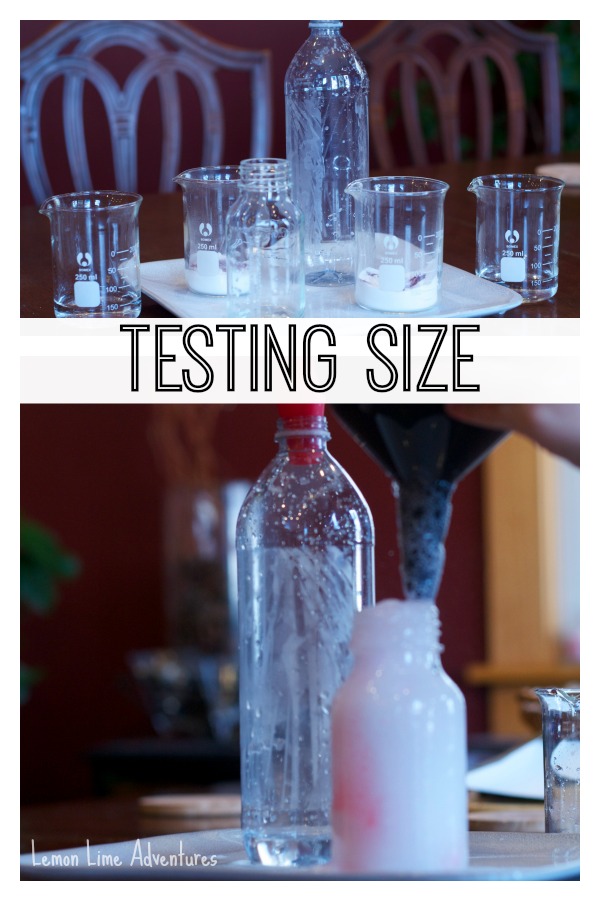
The conclusion was that the taller bottle fizzed much more than the smaller bottle but that it didn’t reach the top of the container like the smaller container. Once again, the boys wondered if they could tweak the experiment just a tad more. All the while, I just followed their lead and helped them set up each new experiment.
Simple Science Experiment #4
For the fourth experiment the boys were curious if it would make a difference if you changed the amount of ingredients (variables).
We kept the the order of the ingredients and the shape and size of the container the same (constants).
This was when it really started to get interesting. We put 2:1 ratio in one bottle (100 ml of vinegar to 50 ml of baking powder) and then in the other bottle we used 4:1 ratio (200 ml of vinegar to 50 ml of baking powder).
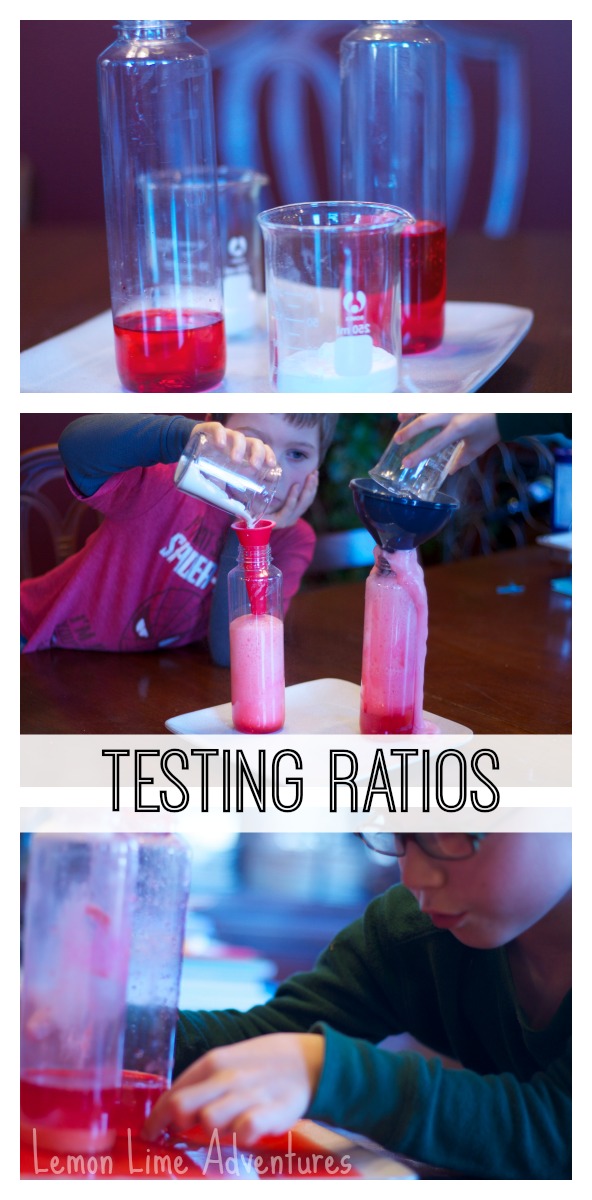
The conclusion was that the bottle with the higher ratio of liquid had a larger reaction. The boys also noticed the decrease in sediment in both bottles. We noticed that the bottle with the higher ration did not have much sediment left over.
Simple Science Experiment #5
For the last experiment, we went back to our original investigation of Volcanoes. We talked about what could possibly be causing the build up of pressure. Legoman suggested that the magma heats up which causes the build up and pressure.
That is why for the last experiment, we figured out how to heat up the vinegar (please use adult help for this one). We tested the difference between hot and cold vinegar (variables).
We used the 4:1 ratio, the same size, the same shape and the same order (constants).
What came next surprised us all!
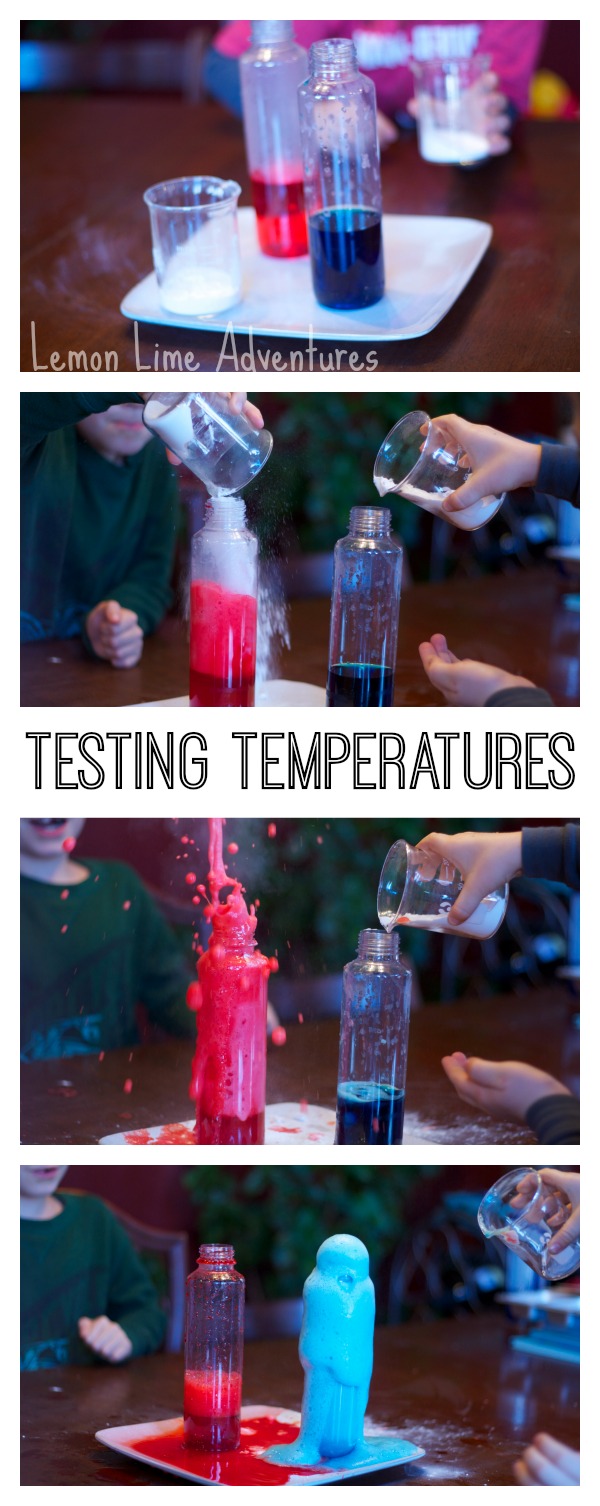
The reaction was so much fun. It was so surprising that we jumped. The boys noticed that there was no sediment left in the warm vinegar. They thought this experiment was so successful that we had to do it over and over again.
Do you want to see Simple Science up close?
I am so excited to share what the experiment looked like. It was such a fun experiment and it was so fun to see how the pictures turned out that I wanted you to see it in action. I hope you enjoy it as much as I do.

Are You Ready for More Science Fun?

Time for Saturday Science Blog Hop!
Visit these great bloggers for more fun Saturday Science experiments too!
Floating Grape Experiment
{P is for Preschooler}
Rising Up!: a littleBLAST Science Experiment & Giveaway!
{Stir the Wonder}
Follow Sarah McClelland’s board Science Experiments for Kids on Pinterest.
What is your favorite science activity? I would love to hear! Follow me on Facebook, Twitter, Google+, Pinterest, Instagram or subscribe by email. I can’t wait to hear your ideas.
It’s so great that they enjoyed going through and testing all the variables and learned from each of the results and figured out a way to improve the tests to get the reaction that they wanted! Love that you were able to catch on camera the exciting reaction of the last test! I’m afraid my camera would have been too slow to get such a cool series of pics!
Thank you! It was so much fun!
I love how they kept wanting to test different things and different methods – true little scientists! And the pictures you snapped are *awesome*!
Thank you so much. I was so happy with the outcome and the boys had such a “blast” 🙂
Definitely the magnet blast…it looks so cool!!
Good Luck! I hope you win!
That last experiment does look like a lot of fun, I know my niece would love it!
Awesome! I would love to know if you try it!
This is awesome. Thank you for sharing this…I know my girls will want to try. I love how changing the variable extends this experiment!
I can’t wait to hear how it goes. 🙂
My daughter would like the construction blast!
I really love how you approach science. Your boys are lucky to have Mom who is also an experienced elementary school teacher. I wish my daughter had teachers like you in school! We have to do a heated vinegar experiment one of those days!